Avoiding Air Bubbles: Tips and tricks for label application
Pressure-sensitive self-adhesive labels are the most common form of labelling for modern packaging; especially for glass bottle labels. These labels can be printed in the Label and Litho factory using digital or conventional printing presses, using a variety of different stock.
An issue we sometimes encounter with labelling is bubbling – which will occur when the label is the wrong size for the bottle, is not correctly applied to the bottle or the bottle has a defect or a heavy silicon coating. You can have the most beautiful label in the world, but if it isn’t adhered properly to the packaging then its beauty is wasted. The best approach to countering label bubbling is taking preventative measures; this starts with designing the right sized label for your product.
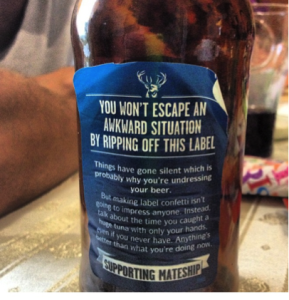
This beer label tackles bubbling head on.
Getting your label to work for your product
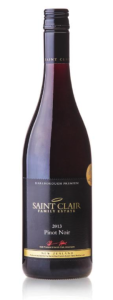
When designing packaging it’s important to think about how the container and its label will fare in the real world i.e. will this wine label survive in an ice bucket? Will this olive oil label stain? Will this cleaning solution label lift if any of the product gets on it?
Label and Litho use a range of label stocks (paper types), including some designed especially for wine labels, that ensure your label best suits your product.
Stocks for labels
Here at Label and Litho we generally use a range of coated paper stocks but we also carry synthetic stocks. Our synthetic stocks are either clear, white or silver.
We have the right stock to suit anything from egg cartons to cosmetics to beer bottle labels with our range of coated papers being must more resistant to dirt, moisture, and wear than an uncoated stock.
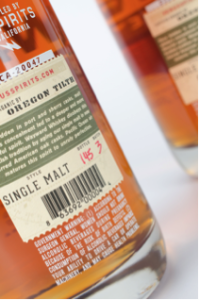
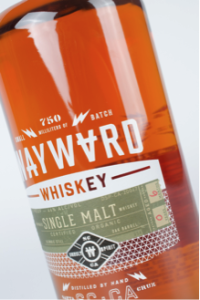
This Wayward Whiskey bottle incorporates different paper stock for the front and back labels. The back label is uncoated, leaving space for the maker to handwrite the bottle and batch number. The absorbent properties of the uncoated paper is what makes this possible.
Chrome coated papers
Most commonly used for logistic labelling, postal labelling, warehouse labelling, chrome coated paper labels are known for their smoothness and whiteness. These qualities make it perfect for small sized labels where text is the dominant feature, and legibility is paramount.
Label size
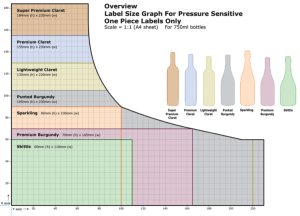
Whilst large labels are a favourite with graphic designers they aren’t always practical when it comes to label application. If you want to ensure your label sticks to a glass bottle properly then you need to ensure your sizing suits the manufacturer’s recommendations. You’ll generally find this on a supplier’s website, or you can request it upon ordering.
The Wine Packagers of Australia have this handy guide for the recommended bottle size:shape:label size ratio.
- Click to download the PDF Guide
Issues applying labels to glass or jars
Where a bottle or jar tapers the label must be warped in shape to ensure it applies properly to the bottle or jar – otherwise it will wrinkle on the bottle or jar.
Ways of applying labels
There are different ways to apply a label, and the best way for your label is going to depend on a number of things:
- size of the label
- type of adhesive
- shape of the container
Small label runs often lend themselves to hand application as there are less labels to apply. With larger label runs it’s always wise to consider using a mechanised label applicator.
DIY labels – hand application
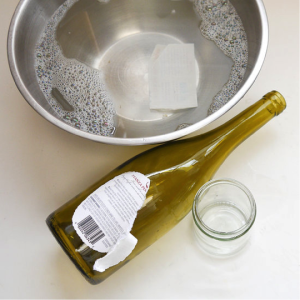
It’s important to start with a clean vessel and clean hands. Take care to remove the liner (backing) from the label without touching the adhesive. When you touch the adhesive it can become contaminated with dust and dirt.
If the label is small, you can generally remove the entire label liner, then align the label on the labelling area, and press the label to the surface. Then, press out any bubbles or wrinkles from edge to edge or centre to edge. A bit like sticking a screen protector to your smartphone, slowly but surely wins this race.
Larger labels may have a slit across the liner so that you can expose the adhesive backing bit by bit. This allows you to apply the label one section at a time, and you can ensure its smooth application as you go rather than having to smooth and eliminate bubbles at the end, which can be tricky and not always work. For the larger self-adhesive label you’ll need to take the same care as with the small label, clean hands and avoid contamination, but you’ll also need to think of label placement as a one shot wonder if the adhesive is permanent!
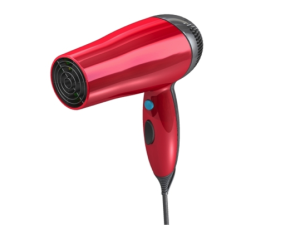
But! If you don’t get the label position right the first time, or the bubbling is too much, then try using a hair dryer to softer the adhesive and then gently lift the label to reposition it.
How to ensure good label cohesion
Label adhesives can need 24-48 hours to completely adhere after application and it’s important to keep it at the recommended label application temperature whilst the adhesive is curing to minimise the risk of lifting or bubbling.
If you want to avoid label bubbling then here are a few more things to consider when designing and printing your label.
Label roll direction, size & cores
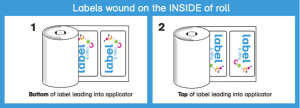
Application machines are designed to apply labels in a particular way, so before ordering your labels you’ll need to find out which wind style your application machine requires. Your label application machine will also have set capabilities when it comes to their core size and maximum roll size. Check what size spool your machine needs before getting your labels printed as it can be a time consuming process to re-wind labels after printing. There will also be restrictions around the total diameter of the label roll size. Generally it will be a maximum of 300mm.
Label gap
It’s important that the label gap is the correct size for your application sensor – generally between 3mm and 5mm.
Label storage
To ensure good label adhesion you also need to take into account how the labels and the packaging is stored before application. Bubbling can be caused in cold conditions and when moisture from the environment gets under the label. Storing the labels in dry conditions is going to help avoid this. Also avoid exposing the labels to too much sunlight.
Surface preparation
Whatever the surface you’re applying to, glass, plastic, card or otherwise, it needs to be dry and free of silicon, oil, dust, and/or oxidised material (like that you would find on a tin or can).
How to choose the right label for your product
Ask yourself these questions before going ahead with printing your product label:
- What surface is the label being applied to? This is very important – we need to know to ensure the stock has the correct adhesive.
- Is the purpose of this label? If it’s going to be refrigerated – think varnished coated paper.
- Do you want something a bit unique for your label? Label and Litho are repeat winners in the Pride in Print Awards and can help you develop a unique labelling solution for your product.
- Will you be applying these labels by hand or machine? Make sure you take a look at our winding style guide to ensure your label is supplied to the correct winding style.
Make your label stand out
Avoid label bubbling and all those other labelling nightmares by printing your labels with Label and Litho. After nearly 40 years in the labelling business we know our stuff when it comes to getting the best out of your label. Get in touch today.
